
This tutorial will show you how to create a 3D beverage can in Illustrator for use in an After Effects marketing video like this one:
Create a 3D Can Object In Illustrator
After you’ve designed your can full wrap, we’ll create a realistic 3D beverage can in Adobe Illustrator using the 3D and Materials engine. Here are the settings in a visual (written instructions are below it).
Download the 3D Can and 3D Pop Top files here:
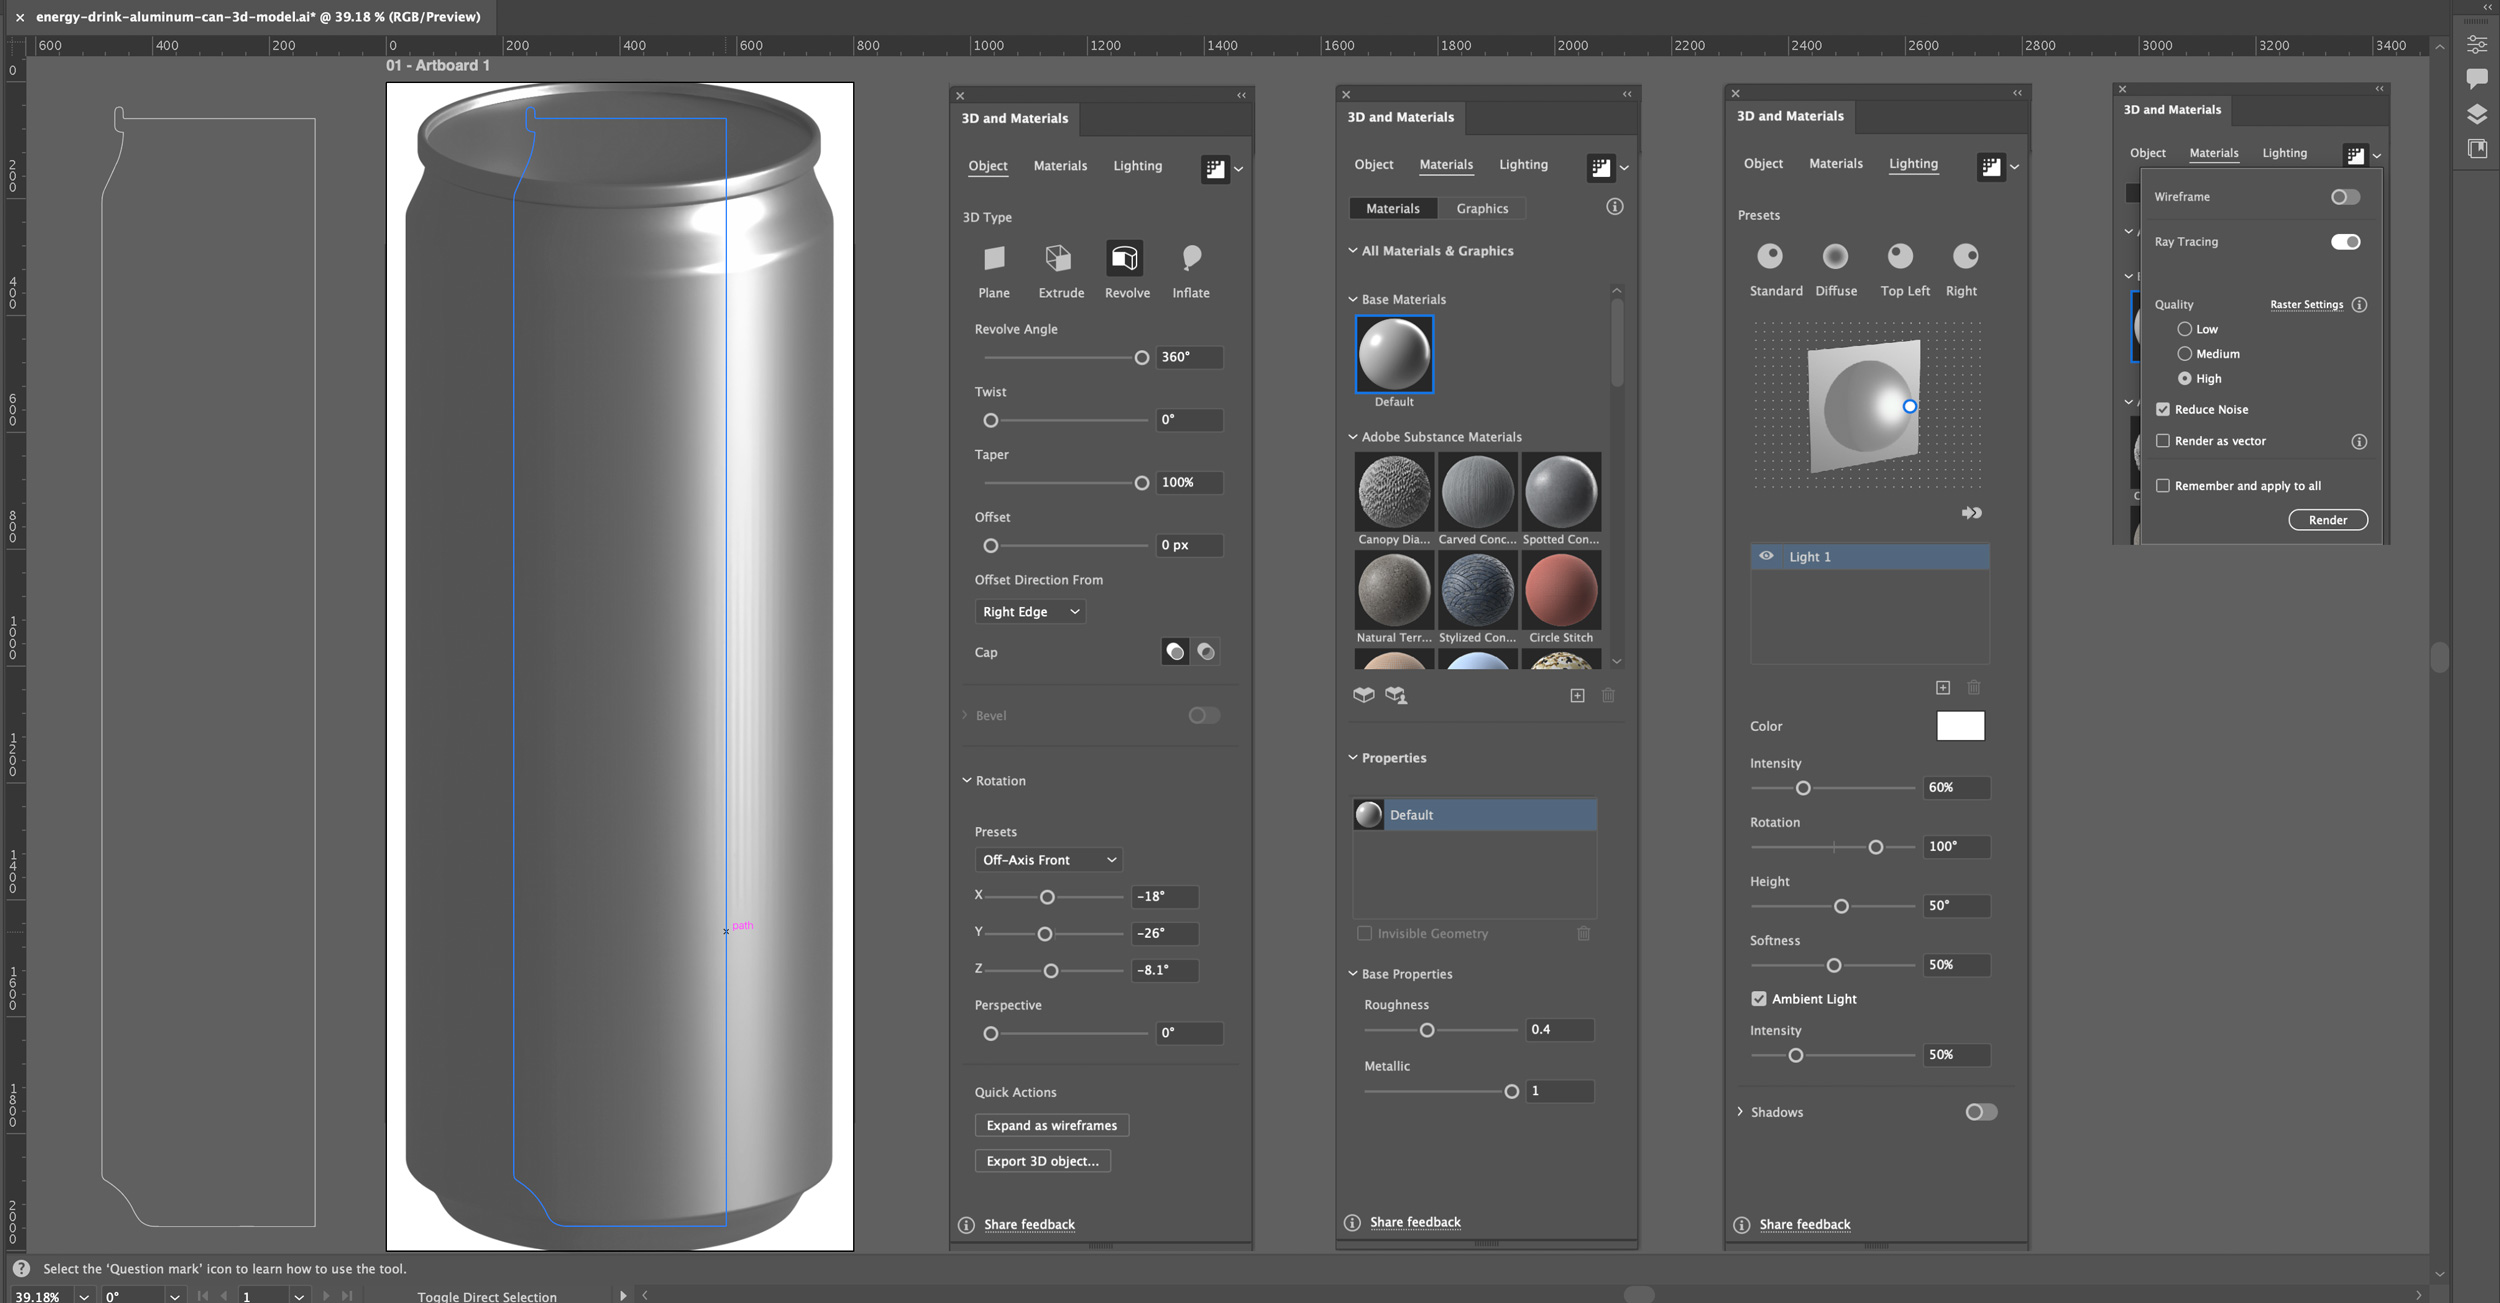
1. Create the Profile (The Vector Path)
- Create a new document in Illustrator: 800 x 2000 pixels, RGB, 72ppi resolution.
- Draw half the silhouette: Use the Pen Tool (P) to draw a vertical profile of exactly half the can in vector.
- Keep it simple: Include the slight inward curve at the bottom and the “neck” at the top.
- Stroke, no fill: Apply a light gray stroke (#CCCCCC) and ensure there is no fill color.
2. Apply the 3D Effect
- Select the half can drawing.
- Go to Effect > 3D and Materials > Revolve.
- In the Object tab, ensure the “Offset Direction” is set to the correct edge (usually the Right Edge) to wrap the path into a cylinder.
3. Dial in the Aluminum Finish
Switch to the Materials tab within the 3D panel:
- Base Material: Choose “Default”.
- Metallic: Crank this slider up to 1.0.
- Roughness: Set this between 0.2 and 0.4. Lower values make it “shiny/mirror-like,” while higher values create that “brushed/matte” look. I preferred the brushed/matte look.
4. Lighting for Realism
Switch to the Lighting tab:
- Intensity: Increase to brighten the highlights. I chose 60%.
- Rotation: 100%.
- Height: 50°.
- Softness: 50%.
- Check Ambient Light and set Intensity to 50%
5. In the Render Settings (click the down arrow in the upper right)
- Turn Ray Tracing “on”
- Quality: High
- Check Reduce Noise
- Click Render
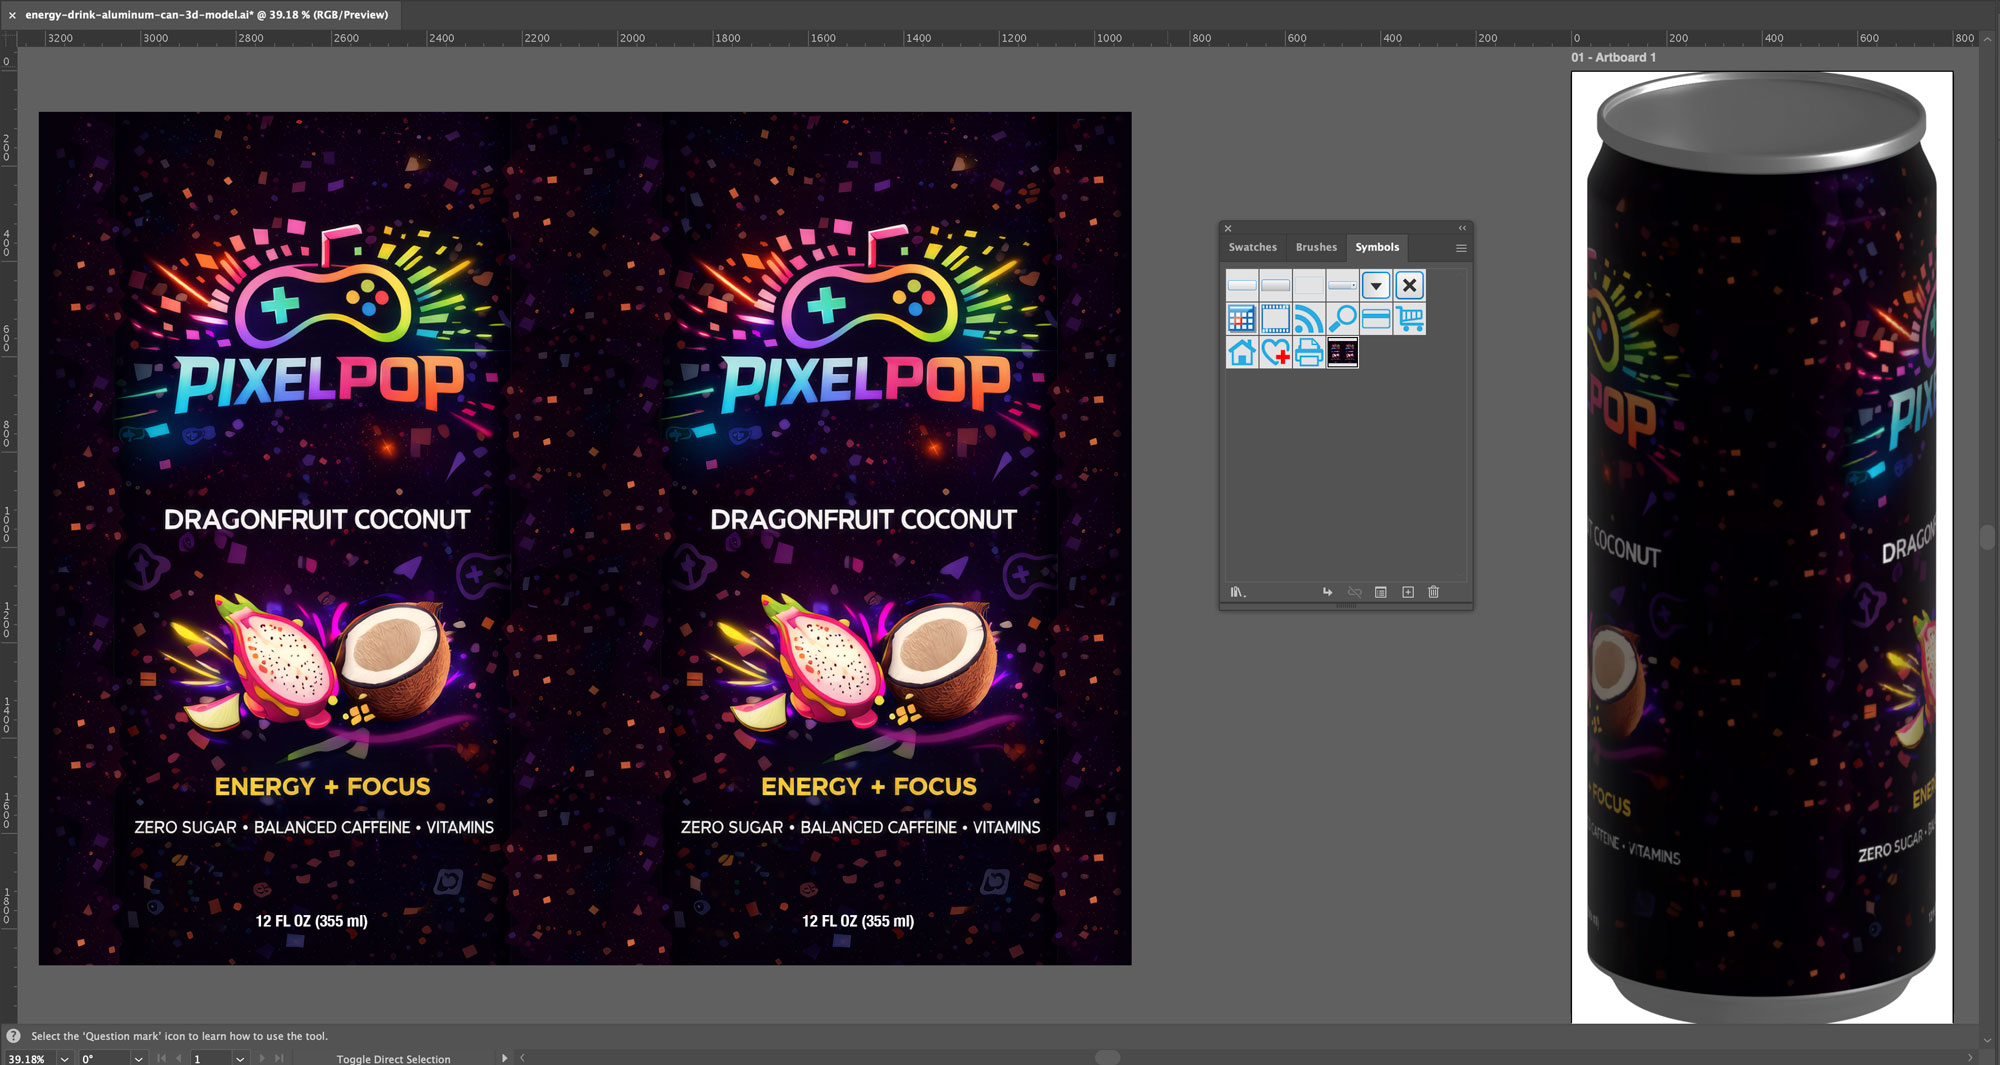
6. Wrap Your Label Design Around the Can
- In Illustrator, with your 3D can file open
- File > Place your can full wrap design into your 3D can file (I suggest fully rasterizing and flattening your can design in Photoshop before placing it. Leave it as a .psd file.
- Window > Links and embed your image by selecting it, and in the flyout menu select Embed Image(s). Choose Flatten Layers to a Single Image. Click OK.
- Go to Window > Symbols and drag your placed full wrap can design into it to create a symbol
- In the Symbols Options panel, choose Export Type: Graphic, Symbol Type: Static Symbol
- Click OK
- Window > 3D and Materials, and click the Materials tab and then the Graphics tab below it.
- Select your full wrap design symbol to apply it to the can
- Click and drag the wrapped design to position it accurately on the 3D can.
7. Creating the Can’s Pop Top
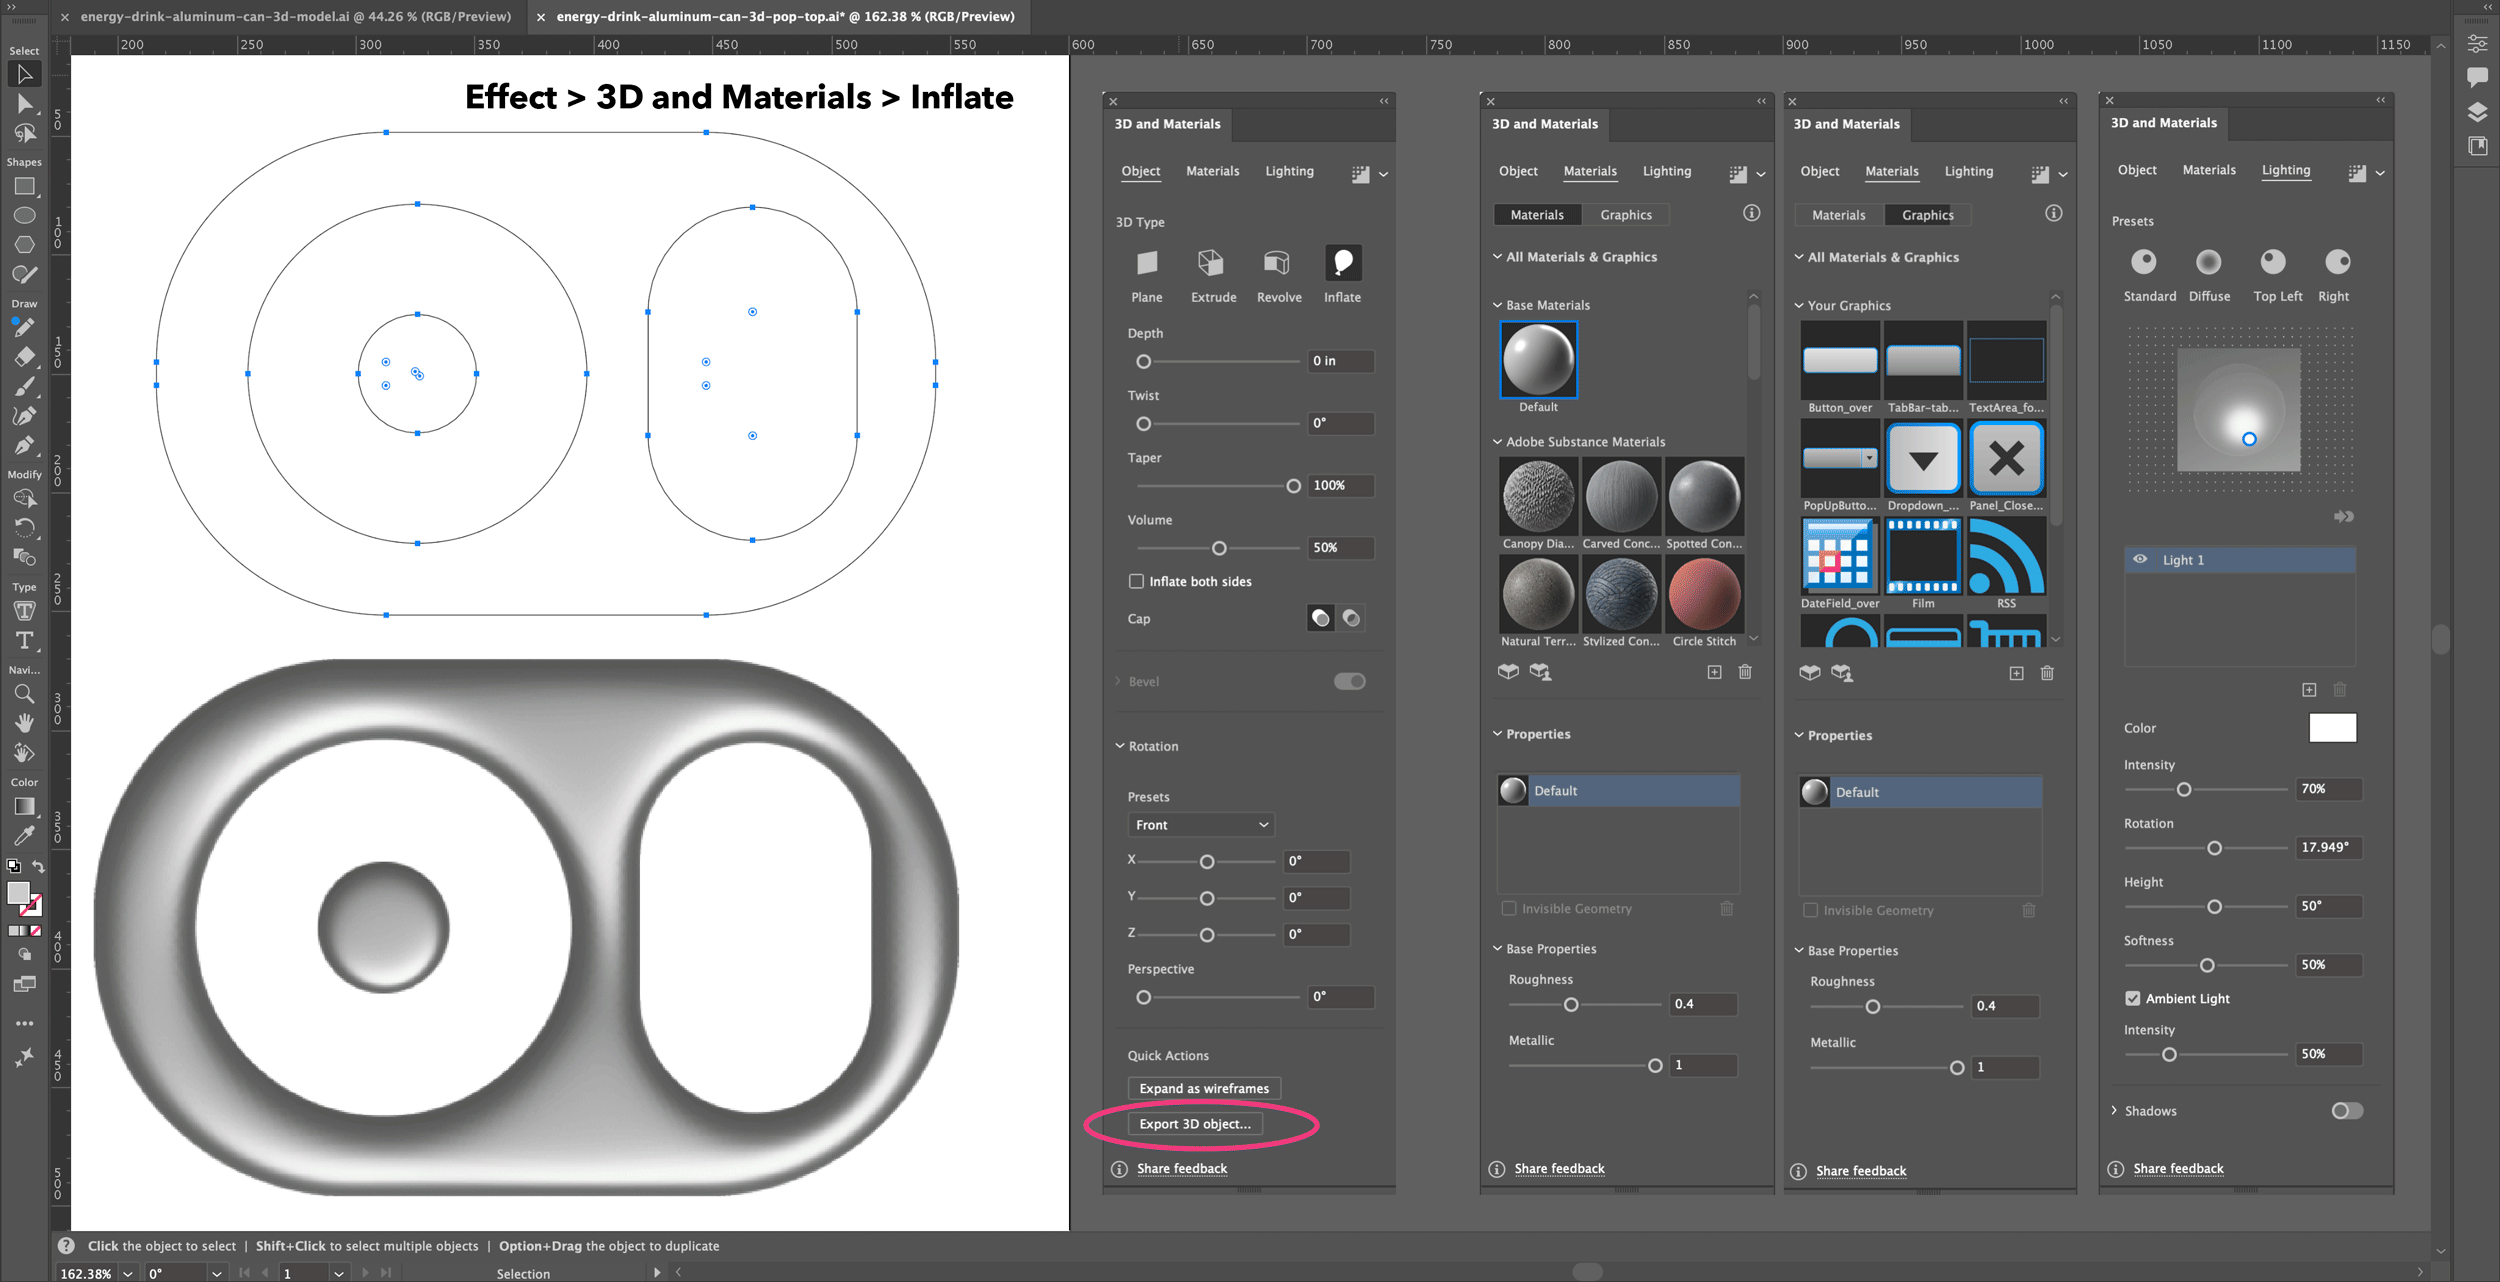
Because the can’s top is a flat surface with complex cutouts, it’s best to create it as a 2D vector graphic first, then apply depth with 3D Inflate, export it as a 3D object, and then attach it to the 3D can in After Effects.
- Draw the pop-top shape in vector
- Select the five shapes and make a compound path
- Fill it with #CCCCCC (light gray), no stroke
- Select the grouped pop-top shape
- Under the dropdown menu: Effect > 3D Materials > Inflate
- You can see the rest of the 3D settings below, along with the final button to click (Export 3D object…)
Here’s a screen capture of my workspace in Illustrator to show you:
8. Export 3D Object(s)
- Select your can on the pasteboard
- In the 3D and Materials panel under the Object tab: select Export 3D object…
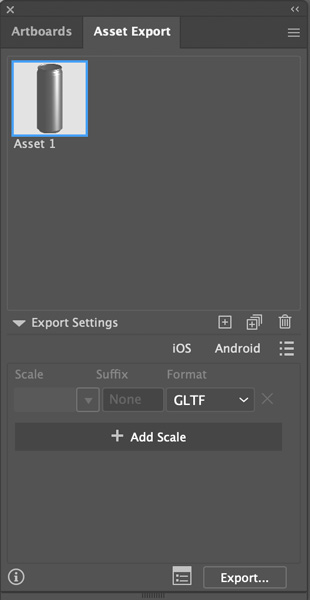
- Select your can or top-top asset (Rename it here before moving on)
- Select Format: .gltf
- Click: Export
- Next, choose your destination folder, and click Choose
This will export them as GLTF files (3D object file format) for use in After Effects
Well done!