This tutorial shows you how to take your own product photography.
If possible, it is best to photograph your own images. Stock photography is okay, but professional designers and art directors like to design and direct their own photos and art. This ensures they match their project’s message, audience, design style, and creative direction.
Your packaging project is no different. Try photographing your own product to showcase your photo direction skills.
Here are a few tips and tricks that I use when taking my own product photographs.
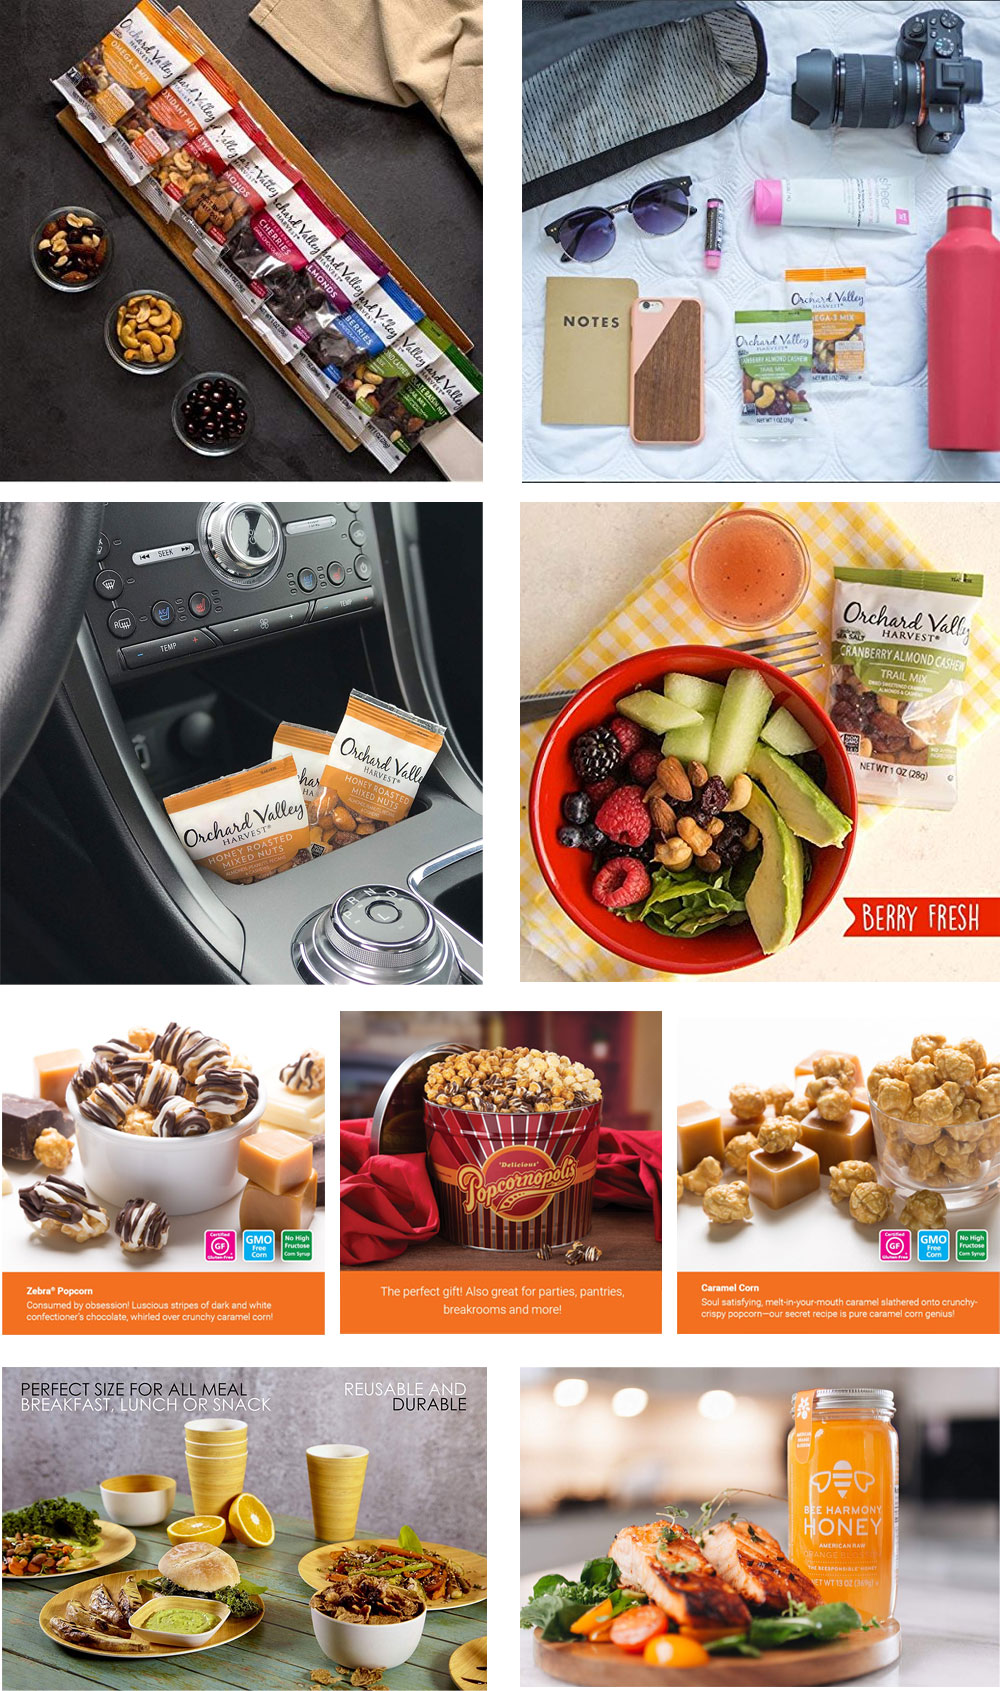
Examples
Here is what you are trying to achieve. These are industry examples of how marketers created settings to highlight and focus on the benefits of each product. They are so much more than product shots, they are branded photos that deliver a message to the audience and set a mood and feeling.
Camera
Use a good quality DSLR. I prefer a Canon, 18MP. It gives a quality image and easily creates a photo that can be used in a 2-page catalog spread (11″ x 17″, 300ppi).
Lighting
Don’t wash out your image with white light. It is always better to have an image that is a little darker—you can always lighten it in Photoshop. If an image is blasted out, leaving completely white areas, you cannot put them back in with Photoshop.
Be sure your lighting is bright enough, allowing for good contrast. But not too bright.
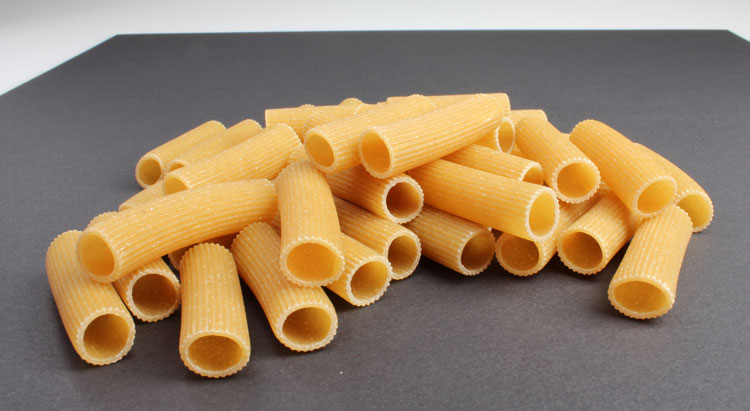
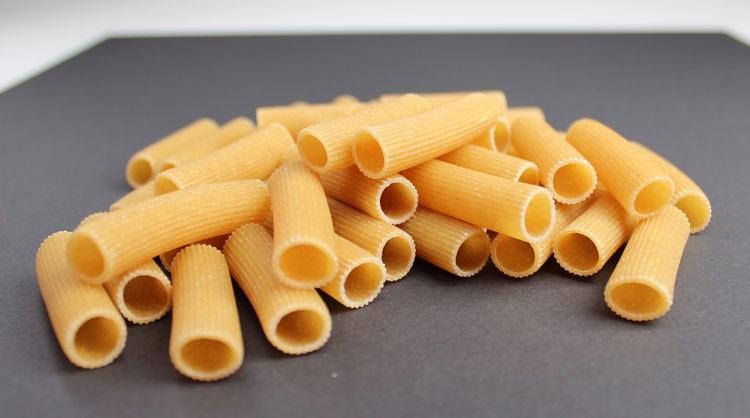
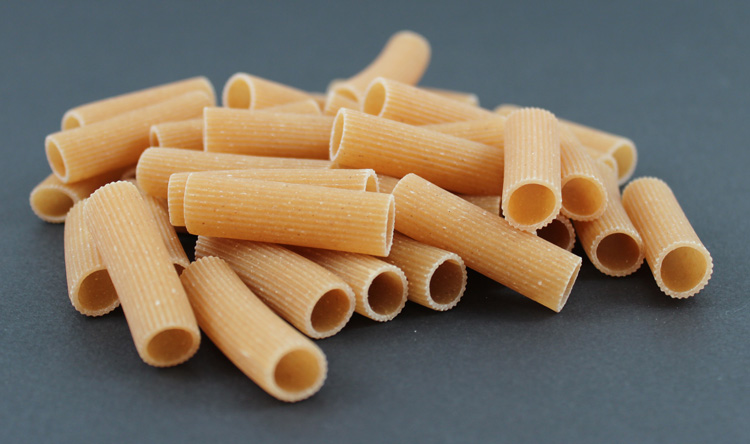
Notice in the pasta photos below that the highlights are not washed out with too much white. And the shadows are soft and dark—not too black and not too crisp.
Watch your Reflections
Be sure to look for unwanted reflections in your photos. Every photo will have reflections because there is light bouncing around everywhere. Your job is to control them as much as possible, keeping them from spoiling your work.
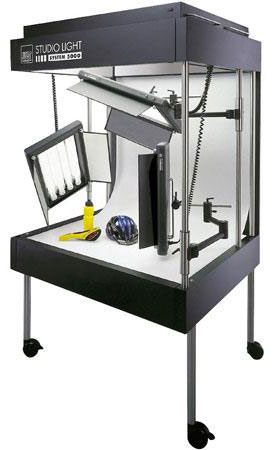
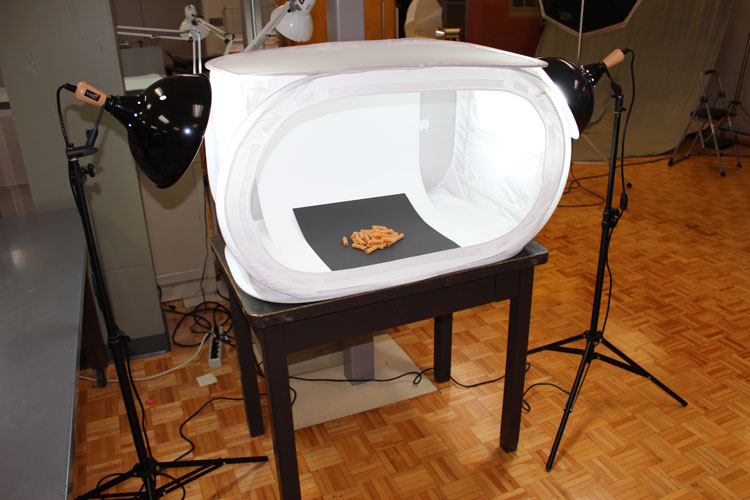
Use a Professional Product Photo Booth (or tent) when possible
We have a great 3.5′ x 3.5′ product photo booth. It takes great shots of products and allows for easy light adaptability. I always try to create a box of enclosed light when I set up my shots in the photo booth. Below I’ve shown an example of this approach. I’ll also show you what I mean in class.
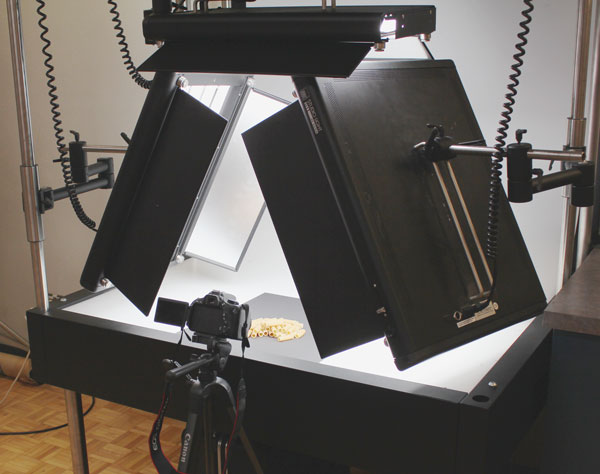
This is how I like to set up a photo booth for product photography. I make a “lightbox” with the lights. This floods the subject with light and creates a nice photo with even balance of highlights and shadows.
Here are our photo booth’s specifications. Just for your knowledge.
- 55 Watt Bulbs (14 bulbs total)
- Color temp: 5500 Kelvin
- Lumens: 2800 per bulb (39,200 total lumens)
Put Depth of Field to work for you
If you’re shooting a product close up or shooting food really close, you should take advantage of your camera’s f-stop settings to control focus. I prefer to use the AV-aperture priority setting so I can control the depth of field.
When shooting close up, increase the amount of your image that stays in focus by using a small aperture setting.
- Small aperture: f/22, f/16, f/11 = Larger depth of field – less blurred image
- Larger aperture: f/4 = Shallow depth of field – more blurred image
Here is the same subject taken with three different apertures and shutter speeds. All have their pros and cons. Each could be used depending on your art direction and the style of photography, you feel best matches your design.
All of these photos used the AV (Aperture Priority) dial setting on my DSLR, 100 ISO, and 0 exposure compensation.
- f22, 1/5 shutter speed
- Deeper depth of field – most of the subject is in clear focus. Not much blurring.

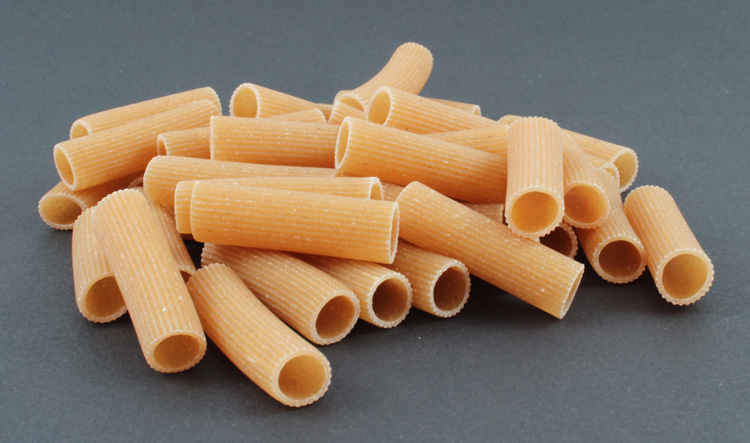
- f8, 1/40 shutter speed
- Shallower depth of field – less of the subject is in clear focus. Some blurring in the near front and far back of the image.
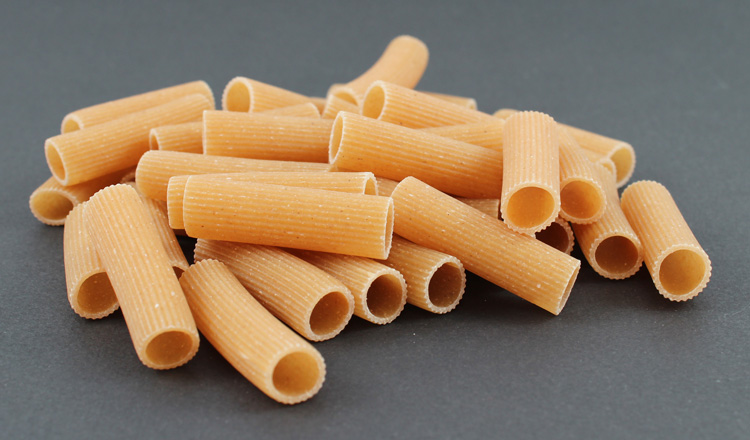
- f4, 1/160 shutter speed
- Shallow depth of field – a few inches in the center of the subject is in clear focus. A lot of blurring in the front and back of the subject.
- Today’s photography, especially food, uses this shallow depth of field to achieve a soft, stylized look. Look at your menu the next time you’re out to eat, can you tell which aperture they used?
I will demonstrate and discuss these topics in class. They are very helpful assets that make a designer’s job easier, and their results more professional.
The Same Photos Using a Light Tent
Here’s the set up:
- 500-watt photoflood bulbs
- Color temp: 4800 Kelvin (new: 5,760K, Blue Daylight Balanced)
- Lumens: 10,500 per bulb (21,000 total)
f22, 1 shutter speed
f8, 1/8 shutter speed
f4.5, 1/30 shutter speed