
You’ll encounter many different lighting conditions when you are out shooting photos and video. To get your best shots, you can adjust the exposure and color controls on your phone.
Most phones don’t have physically adjustable lens openings (Aperture). Instead, you control exposure and color using three core settings: ISO, EV, and WB.
EV (Exposure Value): Quick Brightness Control
What it does: The overall brightness slider for your shot.
- Turn it UP (+): Makes the image brighter (great for dark scenes or backlit subjects).
- Turn it DOWN (-): Makes the image darker (great for preventing blown-out white highlights in bright sun).
- Rule of Thumb: Start with EV! If your phone automatically makes a scene too light or too dark, tap the screen and drag the slider to fix it fast.
ISO: Light Sensitivity & Image Clarity
What it does: Amplifies light digitally when shooting in the dark.
- Low ISO (100–200): Best image quality. Crisp, clean photos with no grain. Use in daylight or well-lit rooms.
- High ISO (800+): Helps you capture shots in low light, but adds digital “noise” (grainy texture).
- Rule of Thumb: Keep ISO as low as possible. Only boost it if your environment is too dark and raising the EV alone isn’t enough.
WB (White Balance): Setting True Colors
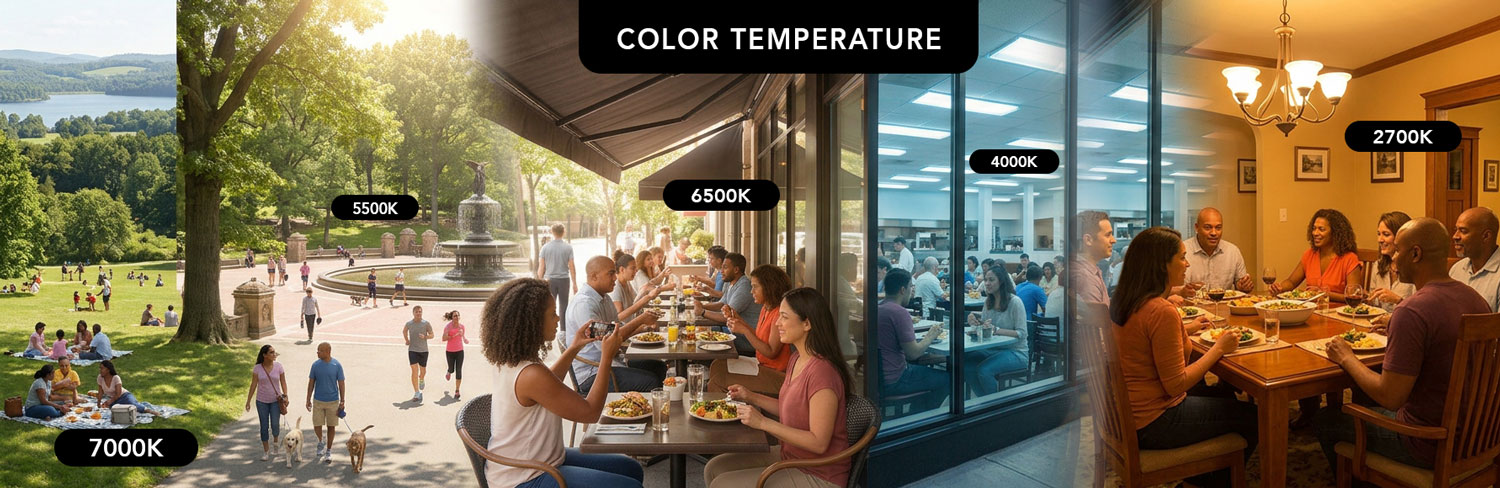
What it does: Adjusts color temperature so whites look crisp white rather than orange or blue. Measured in Kelvin (K).
- Cooler / Lower Kelvin (around 3000K–4000K): Adds blue tones. Fixes overly orange indoor lighting (like tungsten bulb light).
- Warmer / Higher Kelvin (around 6000K–7000K): Adds warm yellow/orange tones. Fixes cold, blue shade or cloudy outdoor light.
- Rule of Thumb: Match the color temperature to your environment so skin tones and products look natural—or intentionally tweak it for a warm or cool mood.
DSLR Cameras – The Exposure Triangle
This is extra, optional reading if you want to learn about the exposure triangle for digital cameras (DSLRs) with removable lenses that can work in fully manual mode.
The exposure triangle is a fundamental concept where Aperture, Shutter Speed, and ISO work together to determine image brightness (exposure) and creative effects. Adjusting one element requires balancing the others to maintain exposure: Aperture (amount of light/depth of field), Shutter Speed (time/motion blur), and ISO (sensor sensitivity/noise).
The Three Components
- Aperture (f-stop): The lens opening size. A wider aperture (small f-number like 𝑓/1.8) lets in more light and creates a shallow depth of field (blurry background). A narrow aperture (large f-number like 𝑓/16) lets in less light, making more of the scene in focus.
- Shutter Speed: The duration the sensor is exposed to light. Faster speeds (e.g., 1/1000𝑠) freeze motion but reduce light. Slower speeds (e.g., 1/30𝑠) create motion blur but increase light.
- ISO: The sensor’s sensitivity to light. Lower ISO (e.g., 100 100) provides clean, high-quality images. Higher ISO (e.g., 3200 3200) allows shooting in low light but introduces digital noise/grain.
Video Exposure Considerations
Unlike photography, video shutter speed is constrained by the frame rate (often set to 1/double the fps, e.g., 1/60𝑠 for 30 fps) to create natural motion blur. Therefore, filmmakers often use ND filters to control light, rather than changing shutter speed.
Balancing the Triangle
- Too Dark (Underexposed): Increase aperture size (lower f-stop), slow down shutter speed, or raise ISO.
- Too Bright (Overexposed): Decrease aperture size (higher f-stop), speed up shutter speed, or lower ISO.
Key Trade-offs
- If you need a fast shutter to freeze action, you may need to increase ISO, creating more noise.
- If you need a deep depth of field (narrow aperture), you may need a slower shutter speed, which could cause camera shake.
Understanding ISO: Sensor Sensitivity & Signal Noise
ISO represents your camera sensor’s sensitivity to light and serves as one of the three pillars of the Exposure Triangle. In technical terms, adjusting ISO is similar to turning up the “gain” on an audio amplifier—it increases the brightness of the signal, but there is a trade-off in quality.
The Quality vs. Light Trade-off
- Low ISO (100–200): This is the “Base ISO” for most sensors. It produces the cleanest, highest-fidelity images with maximum dynamic range. It is the standard for well-lit environments or tripod-based photography where image quality is the priority.
- High ISO (1600+): Increasing the ISO allows you to capture images in low-light environments or maintain fast shutter speeds in dark settings. However, as you “amplify” the sensor’s signal, you also amplify digital noise, resulting in a “grainy” texture and a loss of fine detail.
The Technician’s Rule of Thumb
Always aim for the lowest ISO possible for the lighting conditions. You should only increase ISO once you have reached the physical limits of your Aperture (depth of field requirements) and Shutter Speed (motion blur constraints).
Teacher’s Note: Since we just looked at the doubling effect of stops, you might remind them that moving from ISO 100 to 200 is a +1 stop increase in light, while moving from 100 to 1600 is a +4 stop jump—a massive increase in sensitivity, but with a significant “noise tax.”
Shutter Speed: Controlling Time and Motion
Shutter Speed refers to the length of time the camera sensor is exposed to light. Measured in fractions of a second (e.g., 1/1000) or full seconds, it is the primary tool for controlling how motion is rendered in your frame.
The Motion vs. Light Trade-off
- Fast Shutter Speeds (1/500 and above): These speeds “freeze” action, allowing you to capture sharp details of moving subjects like athletes or vehicles. Because the shutter is open for a very short time, less light reaches the sensor, requiring a wider aperture or higher ISO to compensate.
- Slow Shutter Speeds (1/60 or slower): These speeds allow moving elements to blur, which can be used artistically to show the flow of water or light trails. However, slow speeds introduce “camera shake”; if the shutter is open too long while you are hand-holding the camera, the entire image will lose sharpness.
Aperture: Controlling Light and Depth of Field
Aperture is the physical opening within the lens (measured in f-stops) that dictates the volume of light passing through to the sensor. Beyond exposure, aperture is your technical lever for controlling Depth of Field (DoF)—the zone of sharp focus in your image.
The Focus vs. Light Trade-off
- Wide Aperture (Low f-stop numbers like f/1.8 or f/2.8): The lens opening is physically large, allowing a massive amount of light into the camera. This creates a “shallow” depth of field, where your subject is sharp but the background is heavily blurred (bokeh). This is ideal for portraits or isolating specific products.
- Narrow Aperture (High f-stop numbers like f/16 or f/22): The opening is constricted to a small hole, letting in very little light. This results in a “deep” depth of field, where everything from the foreground to the distant horizon is in sharp focus—the standard requirement for architectural and landscape photography.